
Thief Deadly Shadows is a mostly linear game. You have to traverse the city to reach the next mission and sometimes you are given a choice on which mission to tackle first. The order that you play these missions does not matter, but you may be not completely in sync with this guide. Just know it doesn't matter much and you will play all of the same missions anyway.
As I go into detail on each mission, I will show how to find all special loot items and maps. Within The City as well there are secrets to find and side quest to complete, some of these are worth talking about.
TABLE OF CONTENTS
End of the Bloodline | St Edgar's Eve | Into the Pagan Sanctuary | House of Widow Moira | Sunken Citadel | Killing Time | Of Brethren... and Betrayers | Robbing the Cradle | Gamall's Lair | Still Life With Blackjack | The City

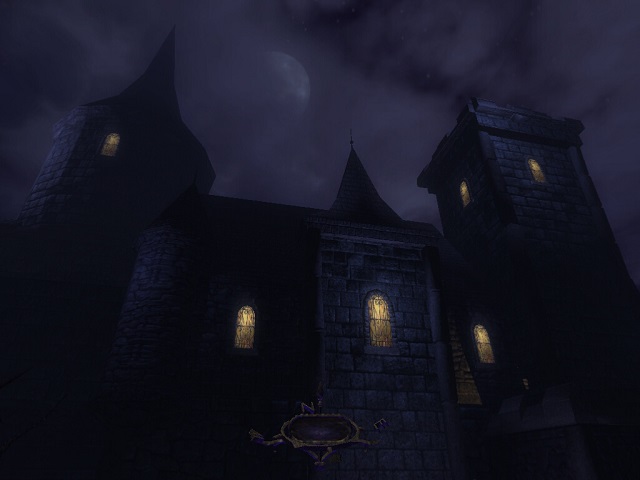
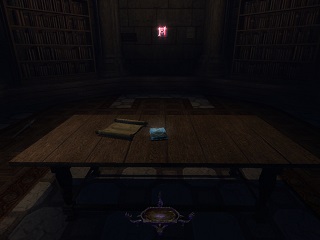
After stealing Lord Julian's medallion from the tutorial mission, Garret brings it to his fence Heartless Perry to tell him more about it. Perry says it belongs to the Rutherfords, one of the oldest so called great families. They have a castle named after them in South Quarter and are bound to have plenty of wealth inside worth taking. This medallion also has some relation to a bloodline opal that the Rutherfords have kept in their vault. That's what we are after.
There are 2 ways to break in: Utilize the extra help from the cook by shooting a water arrow at the torch with the statue head above it. This will open gate on the East side of the building. The other way is by climbing up the ledge in the dark corner on the West side, and entering in through the window.
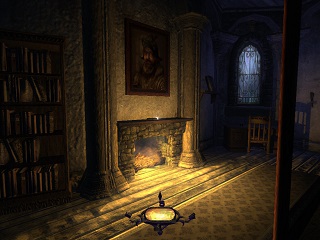
Now your main goal is to find the lever that opens the vault and steal the bloodline opal. Make your way to the next area, the inner quarters. Then gain access to Julian's quarters. You can pick the lock at the front door, or enter in from the window from the outside. The lever is an unlit torch near the fireplace and on the west wall.
Then head back to the castle front area. The vault is west of the grand staircase room, down a hallway with a patrolling guard and down some stairs. The vault door should be open now so can grab the opal.
Special Loot Locations:
|
|
||||
|


After Garrett sells the Opal to his fence, Black market Bertha, he recieves a letter from a man named Artemus. The letter tells Garrett to meet him by the statue in Terces Courtyard. Garrett has a meeting with Artemus who is revealed to be one of the Keepers. He tells Garrett to aquire two objects: The Builder's Chalice and the Jacknall's Paw. In return, Garrett is allowed access to the prophecies as told by the Keepers.
You are given a choice on which mission to tackle first, our first stop in this guide is the Hammerite Cathedral.

During this level you will need to collect a few specific quest items including the High priest's Holy Symbol, the Unstamped Gear, and finally the Builder's Chalice. The holy Symbol is found in the Priest's chambers on the Eastern courtyard of the church. You can ring the bell in one of the corner towers in the church to lure the priest and his guard out of his room. Next, make your way to the factory in the Western courtyard. Inside, search for the storage area to find the unstamped gear. North of Inspector Drept's office, past the furnace, you'll find a large stamping machine. Use it to place the unstamped gear inside. Take the now stamped gear and bring it along with your holy symbol to the Reliquary. Use the 2 items on the machines and the suspension cage will lower, get inside to grab the Builder's Chalice.
Map Location: Enter Stonemarket proper and right at the entrance of the cathedral are 2 thugs having a conversation. The man on the left has the map on him.
Special Loot Locations:
|
|
||||
|


The Pagan Sanctuary is located in the well in South Quarter. The well connects to the sewers which will eventually lead you to the Pagans.

In order to obtain the Jacknall's Paw, you must complete the ritual of root. There is a book in the Shaman's room, on the first floor and on the bed, which describes how to complete the ritual. Essentially, in the taproot cave, which is the underground room with the large tree, you must complete 3 sacrifices. At the altar, shoot a water arrow, then a moss arrow, then you will need to place a dead or unconcious body. You can knock out or kill the patrolling Pagan in the area.
Map Location: It's found within the sewers prior to reaching the Pagan Sanctuary. In the Northwestern end of the sewers, by a guard and in a chest.
Special Loot Locations:
|
|
||||
|


Upon retrieving both items for the Keepers, you return to Terces Courtyard where a keeper opens a secret door to their study. Inside, you are allowed clearance to peruse in the allowed areas and learn more about the dark age.
Eventually you learn that the keepers are trying to acquire and open the compendium of Reproach, but to do that they need the glyph key. The compendium is rumored to be aboard the abysmal gale; a ship that just arrived at the docks. The glyph key is missing and may be somewhere in the sunken citadel.
Next, find the Abysmal Gale and get inside. It's a large ship off of the docks near the tavern. Once inside, make your way down to the third deck and read the ship's manifest. From this note, you learn that the compendium (the golden slab) was found by the crew and the captain kept it for himself. Something about the slab made him delirious and he and the whole crew died. With the slab missing, Garret figures that the now widow Lady Moira may have the slab or at least know its whereabouts. Now, use the rowboat which is in docks, at the other port across from the ship, to start the next mission.
Tip: By day 3, you can buy the climbing gloves from the fence at the docks. While you won't need them to complete this mission, they will be necessary at multiple points throughout the rest of the game. It is recommended you buy them as soon as possible.
Map Location: It's found prior to starting the level, on the Abysmal Gale when you read the ship's manifest.
Stealth Entrance: Use climbing gloves to climb up the foyer outside of the front entrance. Then open a hidden chest high door under the window.
The compendium is found in a secret room in the basement. To find it, first go to the master bedroom on the second floor and listen to the tape left on the victrola device. The voice explains that there is a hidden switch in the study that opens a door in the Northern gallery room. The study is on the first floor in the Southeast end by the grand staircase room. The hidden switch is under the desk by the windows. Once you hit the switch, quickly head North to the gallery room which is past the Rotunda and through the glass window doors. This is where the secret room will be revealed.
Special Loot Locations:
|
|
||||
|


Garret accesses the Sunken Citadel through the sewers in the Docks. Once inside, he presumes that Keeper Rafe may give him a clue on where the glyph key is, since he has gone missing in search for it. The sunken citadel is the secret underground home of the Kurshock, a race of humanoid amphibious creatures. Inside there are also rat men and pagans to watch out for.

Map Location: In the city in the Stonemarket Proper disctrict. Facing the Hammerite church, turn right and go past the city watch storage room. At the end is a prison cell with a locked door. Inside of the cell is the map on the floor.
Your main goals are to track Rafe, find the glyph key, and steal the Kurshock crown. As you progress through the level, you'll see red markings on the walls and floor, follow them. In the next area, the citadel core, you'll eventually find the library. Rafe's remains along with the glyph key are in the back room. Early on in the level, you may read a note about a golden crown. The crown is in the throne room, at the end of the citadel core area. Once you deal with the 2 patrolling Kurshock, the crown is as good as yours.
Special Loot Locations:
|
|
||||
|


Upon returning the compendium and the glyph key, Garret listens to Cadeca read the prophecy. When the progress of time ceases, the evil ones will be pointed out for all to see. The keepers want to wait and see the prophecy carry itself out, Garret isn't so keen to sit and wait. Garret decides to break into the clocktower and stop the clock. So he makes his way inside via a vent in Stonemarket plaza by using the climbing gloves to climb up a pipe.

The main goal of this level, is to descend down to the basement level of the clocktower, and then use a sequence of machines to stop the clock. Along the way, keep an eye out for the mechanical plan. It can be found in multiple locations within the clocktower. One is on the desk of one of the Hammer's office in the upper levels. Another can be found in the Foreman's office in the basement. Once you reach the basement, use the following machines in this order: Steam release, coal dispenser, and the haulting mechanism.
Tip: In the lower clocktower, after going down the first elevator, there is a heavily guarded room with the desk and main entrance. Use noisemaker arrows or gas grenades to get through.Special Loot Locations:
|
|
||||
|


Garret then returns to the Keeper library while the dust settles. Caduca is found dead and Garret is blamed. He's thrown in jail but escapes before they can execute him. Now Garret is on the run and the Keepers sent the enforcers after him. The enforcers are highly trained assassins that have been transformed somehow by the glyphs. All they know is to hunt and kill.
Navigating through the city during this time is difficult. The glyphs have been locked by keeper Orland and the enforcers are searching for you everywhere. Being allied with the Hammers will help greatly when in Old Quarter. Before you can start the next mission, there are a few tasks that must be completed.
Starting off in Old Quarter, first visit your fence, Ramien, on the Southeast end. You discover that he's been killed and there is a note left that tells you to go back to your home in South Quarter. Head Northwest through the Stonemarket gate, then continue on until you get to South Quarter and to the apartments. When inside of your home, deal with the enforcer and read the next note. Now make your way to the Fort Ironwood graveyard in Old Quarter, but this time through a shortcut. After leaving the apartments, head down to black alley and you'll find a new exit at the end of the road. This takes you to the graveyard, where a cutscene will play when entering the tunnel.
Garret has a meeting with some Keepers which don't believe that Garret murdered Caduca. They are seeking the truth and share important information with Garret. Garret thinks that Orland killed Caduca and framed him to try to deal with them both. Garret figures out a way to possibly prove that Orland murdered Caduca.
Your last stop is at the Keeper library. Head to Stonemarket Plaza and make your way to the secret entrance near Terce's courtyard that you used before. This time, use the climbing gloves to climb up the wall where the glyph is to reach a window and enter through there. Once in the library, make your way to Orland's quarters, which are now unguarded. Inside is the entrance to the Keeper Compound.
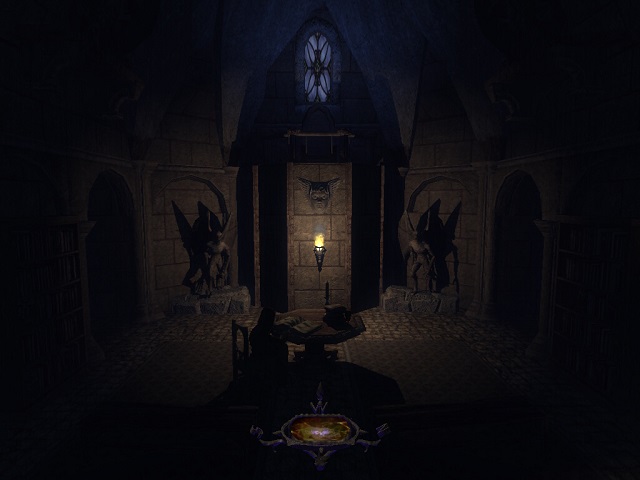
The main objectives of the Keeper Compound are: Search Artemus's quarters and retrieve his ring, search Orland's quarters and find and burn the glyph seal, and gain access to Caduca's room and investigate the murder site. Firstly, you will need to obtain the keeper ring from Artemus's quarters. His room is located in the dormitory, on the first level and through the North door. This ring will grant one of the 2 ways into Orland's quarters. With the ring, use one of the 2 key holes in upper dinning hall or dormintory areas. They are small and placed subtly along the wall. The other option to reach Orland's quarters, is to go to the top of the stairs in the North tower and go down the small tunnel that leads to the council room. Then walk along the ledge until you reach the otherside and lock pick the door. Once in Orland's quarters, find his glyph seal on the wall. You must burn it to destroy it. Either shoot a fire arrow, or take it to a fireplace, such as one in the dinning hall, and drop it in. Now with the glyph seal destroyed, go to the Elder Library and use the glyph on the wall to access the lower libraries. Head West to Caduca's chambers, and read the note in her room in the gargoyle's mouth. This will send you to the Hall of Statues, where a cutscene will play upon entering. Now, sneak or run past the statues to the next room and head upstairs to the secret exit.
Council Meeting: Upon beginning the level, there is a council meeting in the council room, near the entrance of the level. You can influence the outcome of the council by knocking out 2 of the keepers. They are up high in the windows connecting the council room with the other rooms around the compound. The votes in the council will decide whether a guard is placed in Caduca's room and whether the special books will be moved from the Elder library to the scribe room. These outcomes don't change much in the end and it's not necessary to intervene to complete the mission.
Map Location: It's found prior to starting the level. In the forbidden library within the Keeper library. To access the forbidden library, there is a hidden floor switch in the living quarters right by a bookshelf. Step on the switch and a door will open by the beds. Use the glyph to gain access to the library without getting spotted. Once in the forbidden library, go to the second floor and into one of the alcoves with the bookshelves.
Special Loot Locations:
|
|
||||
|


Back at the Keeper Compound, Garret as an unexpected visit from someone that knew he was there and why. The individual is an old woman who has the power to bring statues to life, among other things. This hag was responsible for Caduca's murder, and now she's after Garret too.
Garret manages to escape through a secret exit and ends up back in Old Quarter. The only man that may know about this hag is Inspector Drept, in Auldale. Garret heads there and pays him a visit.
Drept is at the pub, and the only way in is through a window with a hammer symbol on it. It's just outside of the Pagan park. Approach it to start a cutscene.
Drept explains that he remembers the hag from Shalebridge Cradle orphanage that he grew up in as a child. The hag murdered his friend, and he never dared to return to that place. He's been searching for this hag ever since. Garret decides that the orphanage is the best lead he's got to find this hag, before he's killed by her as well.

Lengthy and in depth guide: Enter Shalebridge through the basement on the East side of the building. The first objective is to get the power back on so you can open the portcullis. The generator is down in the flooded level in the basement. To return power, you must replace the fuse box. The fuse box is in the attic. To reach the attic, go to the lobby and head upstairs. You will hear a knocking sound, follow it to the attic door. In the attic, you meet Lauryl, the spirit of the girl who died in the orphanage. She will ask you a few tasks to help free her from this place. Firstly, find the bottle of her blood in the cellar. When you make your way down, replace the fuse to start the power back up. Then grab the bottle of blood while you're there, it's on the shelf of the room with the cage. Now head back up to the lobby and use the bottle on one of the drain pipes. Now you need to go to the White Hall, where the patient's rooms are, and find her nightgown. Go through the now open portcullis and make your way to the inner cradle.
This area has crazed inmates patrolling around who can't be blackjacked, but they can be knocked out with a few flashbombs or killed by shooting fire arrows at them. Head North through the mazelike hallways until you see doors labeled as different numbers. Look for No.5 and remove the bricks in the back wall to find the nightgown. Now go East to the Morgue and use the nightgown on the large furnace in the middle. With that taken care of, you now need to grab one of the unique items or toys from one of the patient's rooms. Then bring it to the special location. Lauryl will tell you where you need to go when you pick up a toy. You only need one, unless you're caught. Now you're in the past, and can access new places that were blocked before. Make your way to the nursery tower to find Lauryl's diary. The nursery tower is South from the Morgue entrance, and up the stairs. You'll find the diary by one of the beds in the back. Make sure you read the incident report on the podium! This is necessary for completing your objective on finding out more about the hag. Now head back down to the Morgue, and burn the diary. Now for the last request from Lauryl, find the dissolution serum and use it to clean her blood stain in the attic. The serum is in Treatment Room B. Enter in from room A and grab the serum from the back where the guard can't see you. Now make your way all the way back to the attic. Watch for the patrolling guards near the portcullis. Use the serum on the blood. Now meet Lauryl in the lobby and follow her spirit to the front door.
Of course you can't get out that easily, so now you have to go back in time as yourself. Head back to the storm cellar and lock yourself inside of the cage. Be careful leaving the cage after you're sent back in time. There is a guard patrolling right outside and he will see you if you leave when he's too close. If you get caught by a guard this time, they will kill you, so save often. Now, to escape this place, head back up and go to the staff tower. After climbing up both ladders and passing the portcullis, it's directly East from there. At the end of the room, there is a door. If you didn't complete all of your other objectives up to this point, Garret will make a comment and you won't be able to open the door. Make sure you read the incident report in the nursery tower while in the past, you can't complete the level without that. Now past the door, keep going North until you reach the elevator, ascend all the way up. Then reach the window by jumping on the table and running past the guards. Now you're finally free of this place.
Map Location: Found in the catacombs underneath Fort Ironwood within Old Quarter. Inside, descend all the way down and search for the architect's grave.
Special Loot Locations:
|
|
||||
|


While not an official level, this city mission is a bit lengthy and difficult, so it deserves its own section in the guide.
During Day 8, after Robbing the Cradle and following the spirit to the catacombs, Garret must make his way to the Keeper Library to warn them about Gamall and find out what he needs to do next.
After visiting the Keeper library and watching the cutscene, Garret is tasked with finding Gamall's Lair. While there he must also find the missing artifacts, learn why she wants the artifacts, and find information on the final glyph.
Head to Auldale and visit the pump house. Read the note by the door which explains that the pump house has been closed off and the canal flooded to block the creature's lair. Head to the park with the Pagans to retrieve the artifact. If your allied with the Pagans, then they will give it to you. Otherwise, you must steal it. With the artifact, go back to the pump house and the vines will be removed. Go inside and turn the valve to lower the water level. Gamall's lair is now accessable in the canals.
Once in Gamall's lair, make your way upstairs until your in the main room and you can hear the statues walking about. As tempting as it may be to try to kill some of them now with your fire arrows, I don't recommend it. Soon you will aquire an upgrade that will allow you to knock them out with your blackjack.
Tip: You can head for the library first and obtain the glyph that will let you knock out the statues, then backtrack and collect the 2 artifacts with your new ability. This will make the rest of the area easier to deal with.The Builder's Chalice is located in the study room with the single patrolling statue. The Jacknall's Paw is located in the reception room with the pedestals and 2 patrolling statues.
|
|


Gamall's Library contains the glyph you need and additional information on what her plan is. To reach her library, head to the exterior courtyard/garden where the giant statue patrols. Then use your climbing gloves to scale the wall and get onto one of the balconies. Upon entering the door, a cutscene will play. After the cutscene, remember to grab the glyph on the wall.
|


To gain access to the museum, enter a tunnel through a grate in the floor in a small alleyway West from the museum entrance. Open the grate and drop down into the tunnel. Inside, there is a letter addressed to Garret. It's from Carmen, the fence in Old Quarter, and tells him of a couple replica artifacts she has for sale. You can stop by and buy these along with a map to the museum, which will help make the mission a little easier.

The only way inside of the museum is the front doors. Either pick the lock, or steal the key off one of the guards at the front. Once inside, read a note which mentions the power stations. These power stations are one of the ways to get past the electrical security systems guarding the valuable items. The other way to bypass them is to shoot a water arrow at one of the electrical conduits. That will temporarily disable it, giving you enough time to take the item. There is also a note at the front doors that mentions the locations of each artifact. The Heart is in the East wing, Kurshok Crown is in the West Wing, and the Eye is in the Atrium.
Heart: On the first floor in the East wing, go to the Grand staircase room. Bypass the electrical field to take the heart. If you're trying to avoid knocking out or killing, then replace each artifact with the replica you bought at Carmen's place. Otherwise, it doesn't matter.
Kurshok Crown: Enter the West wing through either the entrance hall, or down the stairs from the East wing hallway. The Kurshok crown is located in another electrical field, in the large main hall of the West wing
Eye: Now go to Tesero Hall and find the Main Atrium, it's a huge open indoor area with a skylight and balconies. Upon entering, the eye will speak to you. You must go to the ground level and hear more from the eye. The only way to access the lower level is either through one of the large portcullises or from a locked door in the inner courtyard. Once you listen to the eye on the floor level, make your way up to the Curator's Office. To get there, go back to the inner courtyard and go upstairs until you reach the top level with a door to Tesero Hall. Then go East around the balcony, until you reach a large room with hallways and stairs which lead down to the portcullis. On the top level of this room are stairs that go up to the Curator's Office. Use a gas grenade to deal with the 2 guards. Go up the stairs into the office, and pull the lever on the balcony. This will raise the statue in the Atrium and allow you to grab the eye from one of the lower balconies.
Map Location: Carmen the fence in Old Quarter will sell the map after visiting Gamall's Lair and gaining the objective to break into the museum.
Special Loot Locations:
|
|
||||
|


In between story missions, you are given the freedom to explore The City. The City acts as a central hub that connects each mission, as well as a place where you can sell loot and buy equipment, and break into various buildings for more gold.
There are also various side missions that you can find around the city. Certain days have new missions to complete and events to encounter. Here is a list of the side missions I have been able to come across.
Day 1 and 2:
- In Garret's apartment, break into the landlord's room and read the note on the desk. This will reveal a blackmail drop off in black alley in a small grate on the ground.
- In Stonemarket, you can overhear a deal between a citizen and a Garret impersonator. The deal is to steal the orincross dagger from Cothron's armory which is located in Stonemarket Proper. Then drop it off at the donation box outside of St Edgar's church. The money will be left in the box upon reloading the area and can continue to be recollected daily.
- In Stonemarket Proper, right near the entrance to St Edgar's Church is a small cell in a dark alley. Unlocking the cell will free a creature named Gravid. Inside of the cell is a map of the Sunken Citadel.
- In Stonemarket Proper, if you visit the stonecutter shop across from Cothron's armory, there is a journal you can read. The journal indicates that Crowley, the stonecutter, hid some gems behind the gargoyle statue in Terces courtyard.
- If you get yourself killed by the guards, you will be captured and taken to Pavelock Prison. You must escape and find your gear. There is also some additional loot to acquire along the way.
By day 3 after visiting the Keeper's compound and speaking with Artimus, you learn about the factions reputation system.
The Hammerites and Pagans are now hostile and will attack on site if you enter their territory. Each faction will give you a list of jobs you can do which will increase your faction alignment with them.
Hammers:You gain a new ability to kill rust mites with your arrows. They are large beetles found around the city.
They also ask of you to kill undead. Throw holy water on them to kill them. 2 bottles should do it.
Pagans:Shoot moss arrows into the cornerstones which are located at the base of building corners.
Shoot elemental arrows in their elemental cocoons. The cocoons look like gates made out of tusks.
Day 3
- In the docks you can learn about a sapling that the guards are holding. The pagans want the sapling for its power and the Hammerites want to burn it so the Pagans can't use it. Either burn it in the tavern fireplace for the Hammers or bring it to the soil patch in the Pagan's territory.
Day 6
- In Old Quarter: A map of Shalebridge Cradle is kept in the architect's (Moresy Blander) grave in the catacombs under Fort Ironwood. His will which mentions the location is found near the entrance to the black market fence and in the rafters.
- The Hammers are trying to bury Alfred Hurley in the Old Quarter graveyard, but can't as long as the zombies keep regenerating. Either shoot a moss arrow at the cornerstone in the graveyard (NE) to satisfy the Pagans, or find the Pagan shaman in a small sewer maintenance tunnel in Old Quarter near the entrance to the Docks. Then either kill him or steal his staff, to please the Hammers.
Day 7
- In the Audale plaza, you can overhear a conversation between the store owner and a thug that calls himself Jimmy the knife. He has locked the store owner's store due to the owner selling him fools gold. Either kill or knock out Jimmy, then return to the plaza after reloading the area to find the store open again.
Day 8
- In order to progress the story, you must find Gamall's lair in Auldale. Head to the pump station and read the note on the door. Then go to the park where the Pagans are and, if you're allied with them, they will give the artifact to you. Otherwise you will have to steal it. Use the artifact to remove the vines from the door and go inside. Use the valve to lower the water level which will allow you to get into the canals. This will lead to Gamall's lair.
Day 9
- After the museum heist, you must place all 5 artifacts in their specific spots across each city district. Your mission objectives will tell you the exact locations for each artifact. You know when you're in the right area because Gamall will be patrolling near it. Also raising your reputation to allied for each faction really pays off here because they will be busy fighting off Gamall's statues and will ignore you completely.